
Last updated September 20, 2026
Free on-site gate assessment - hinges, posts, and your LiftMaster or Nice gate operator checked before anything is quoted
The assessment is free and the quote is the invoice.
 Before
 After
After Before
 After
After Before
 After
AfterGate Repair Maintenance Checklist for Huntington Beach Homeowners
Most printable gate maintenance checklists tell you to “inspect hinges for rust.” That instruction is nearly useless. Surface oxidation on a powder-coated hinge is cosmetic. But if the hinge wall has lost 40% of its material thickness, the gate will drop a quarter inch, the motor will work against that new angle, and the gear will strip within a season. The difference between those two conditions is measurable, and knowing how to measure it is what separates homeowners in Huntington Beach who spend $180 on hinge replacement from those who spend $1,400 on a new operator. This checklist gives you the pass/fail threshold for every inspection point so you can tell normal coastal wear from a failure that’s 90 days out, and complements our Gate Repair Warning Signs: A Huntington Beach Homeowner’s Reference Guide.
Quick Answer
A gate maintenance checklist only works if each item has a defined pass/fail standard. For Huntington Beach homeowners, a gate passes inspection if the leaf sags less than 1/4 inch at the latch post, the motor draws under 12 amps at full travel, the photo-eye lenses are clean and aligned within 1/8 inch, and the terminal block shows no green or white corrosion. Any reading beyond those thresholds means you’re looking at a repair within the next 90 days, not a twelve-month item to watch.
Table of Contents
- Gate Sag: The 1/4-Inch Rule That Predicts Motor Failure
- Hinge Wall Thickness and the Salt-Air Corrosion You Can’t Wipe Off
- Motor Amp Draw: What the Number on the Multimeter Actually Means
- Terminal Block Corrosion and Why Conduit Seals Matter in Huntington Beach
- Photo-Eye Alignment and the 1/8-Inch Standard
- How to Log Findings Across Visits So Patterns Appear
- What a Homeowner Can Verify Without Tools vs. What Needs a Technician
 Before
 After
AfterGate Sag: The 1/4-Inch Rule That Predicts Motor Failure
A gate that sags doesn’t just look tired. It transmits that angle into the operator every single cycle. The motor was designed to push a leaf that travels in a flat plane. When the leaf drops, the motor pushes uphill against a lever arm that gets longer the further it travels. That extra load shows up as heat at the gearbox and wear on the limit switch. In Huntington Beach, where the marine layer keeps metal damp for hours after sunrise, sag tends to progress faster than it does inland because the hinge pins wear into softened metal rather than holding their original bore.
Here’s how to measure sag yourself, without any tools beyond a tape measure and a level:
- Close the gate fully and stand at the latch post, the side opposite the hinges.
- Measure the gap between the bottom rail of the gate leaf and the top of the latch post or strike plate. Record that number.
- Open the gate halfway and measure the gap at the same point.
- Subtract the halfway reading from the closed reading.
If the difference is 0 to 1/8 inch, the gate is within normal tolerance. Maintenance is a hinge pin lubrication and a check of the bracket bolts. If the difference is between 1/8 and 1/4 inch, you have developing wear. We’d recommend checking it again in 60 days during the dry season, or 30 days during heavy marine-layer months. If the difference exceeds 1/4 inch, the hinge wall has lost enough material that adjustment alone won’t hold. The gate needs hinge replacement or weld reinforcement, and the motor should be inspected for gear wear caused by operating against that angle.
One thing we’ve seen repeatedly on gates within a mile of the water in Huntington Beach: sag that reads 1/4 inch at the latch post is often 3/8 inch or more at the motor mounting bracket. That’s because the hinge post is where the load concentrates. When the hinge post itself leans, the operator arm has to compensate for two different planes of travel. The motor runs hotter, the limit switch overshoots, and the controller starts throwing error codes. Measure the sag. Then write the number down. You’ll need it for the log section.
Hinge Wall Thickness and the Salt-Air Corrosion You Can’t Wipe Off
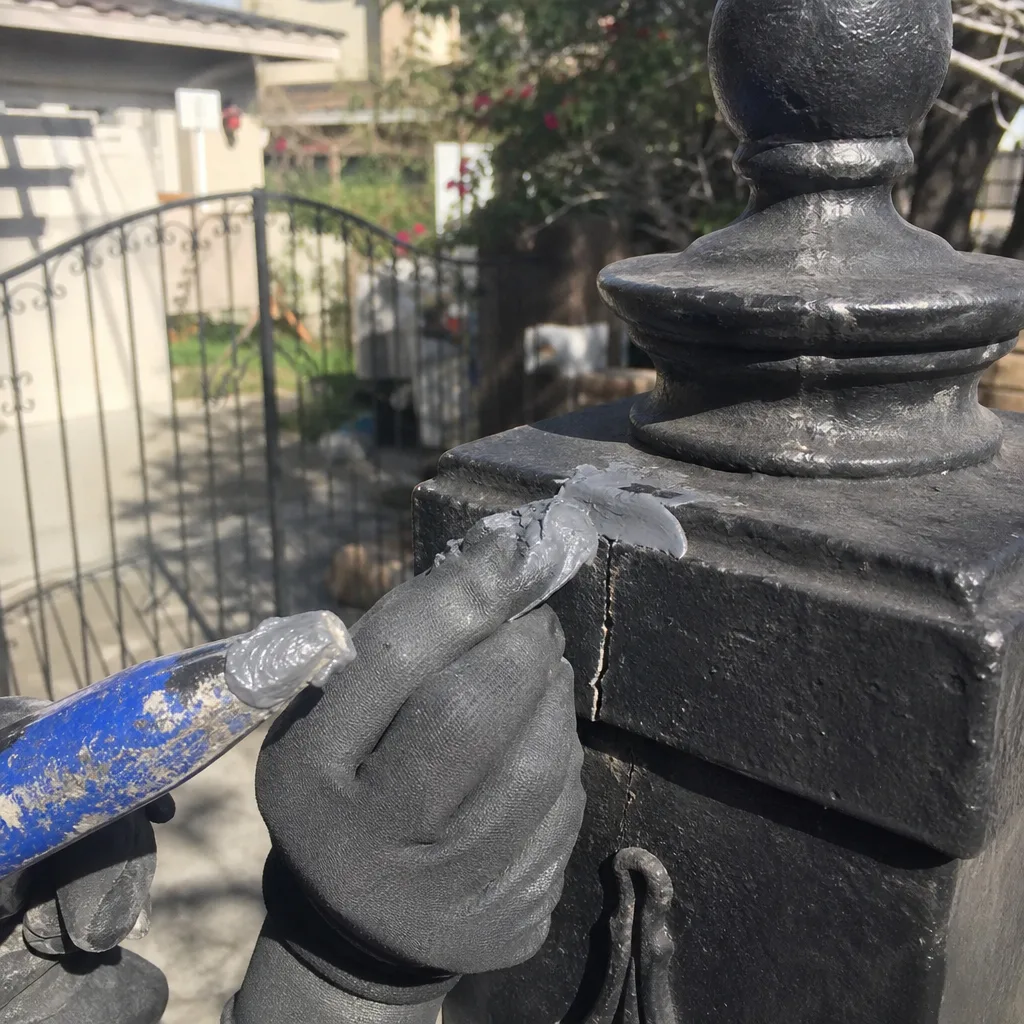
Salt air in Huntington Beach does not rust a hinge evenly. It attacks the material behind the powder coat, where the hinge barrel meets the leaf bracket. The first sign is bubbling along the edges of the weld. The second sign is a white or green powder forming at the pin. The third sign, the one that matters, is flaking when you tap the hinge with the back of a screwdriver. Surface rust you can wipe off with a rag is cosmetic. Flaking is material loss.
Here’s the pass/fail standard we use on service calls:
- Pass: Surface discoloration only, no flaking, no loose material, hinge pin moves freely by hand when the gate is unweighted.
- Watch: Bubbling along the weld line or rough texture on the hinge barrel, but no measurable movement when you lift the leaf at the latch end with one hand. Re-check in 90 days.
- Fail: Flaking metal, a pin that binds, or vertical movement at the hinge barrel when you lift the gate leaf. The hinge wall can no longer hold the pin in alignment.
A hinge that fails the lift test is doing more than making the gate sag. It’s changing the distance between the motor arm pivot and the leaf bracket. As that distance changes through the travel arc, the operator pulls against a mounting point that is no longer where it was when the system was installed. We’ve documented gear teeth in Gate Motor & Opener in Huntington Beach systems that stripped from hinge wall loss before anything else failed. The hinge is the cheapest part of the system. The motor is one of the most expensive. Trade them in that order.
For hinges within two miles of Pacific Coast Highway, we recommend pulling the pins once a year, cleaning them with a wire brush, and greasing them with a marine-grade lithium product. Not WD-40. WD-40 displaces water. It does not leave a load-bearing film. On a 400-pound steel gate, the hinge pin needs a lubricant that stays under pressure, not one that evaporates in two weeks.
Motor Amp Draw: What the Number on the Multimeter Actually Means
Every gate motor has a rating plate that lists its maximum amp draw. Most residential swing gate operators in Huntington Beach, whether they’re BFT, Linear, Viking, or Ghost Controls, run between 1.5 and 4 amps under normal load. If you or a technician measures the motor pulling more than 12 amps at any point in the travel arc, the motor is working against something that will kill it. Here’s how to read the number.
A clamp meter on the positive motor lead while the gate opens gives you a real-time amp curve. A healthy system spikes briefly at startup, settles into a steady draw, and spikes again at the stop point. An unhealthy system shows one of three patterns:
- Sustained high draw across the entire travel: The gate is binding. Usually the hinges, sometimes a warped leaf or an obstruction in the track for a slide gate.
- Spike at the mid-point only: The gate hits a tight spot in the travel, often from a bent rail section or a wheel bearing gone flat on a sliding gate. The motor pushes through it, but it’s overworking every cycle.
- High draw at startup that doesn’t settle: The capacitor is failing, or the motor is trying to start under pre-load because the limit switch was set wrong and the controller is pushing against the mechanical stop.
You don’t need to own a multimeter to use this section. But if a technician ever tells you “the motor is drawing too many amps,” ask for the number. A motor pulling 6 amps on a rated 4-amp system is overloading. A motor drawing 12 amps is running so far outside its design spec that failure is predictable within weeks, not months. We photograph the amp reading on every Gate Repair in Huntington Beach visit and include it in the written record so the next visit has a baseline. Without a baseline, you’re guessing. With one, you can see the pattern before it becomes a breakdown.
Terminal Block Corrosion and Why Conduit Seals Matter in Huntington Beach
The most common salt-air failure we find on Huntington Beach gate systems isn’t the motor. It’s the terminal block, which is the strip of screw-down connectors where the low-voltage wiring from the photo-eyes, keypad, and safety loop lands on the control board. Humidity off the Pacific gets into the operator housing through the conduit if the seal has dried out. Then it condenses on the coldest surface, which is usually the metal terminal screws. The result is electrolysis: a slow eating away of the copper strands where they contact the screw.
You’ll see it as a white powder or green crust on the terminal screws. That corrosion adds resistance. The controller reads the voltage drop as a fault, or the circuit simply stops working. The maddening part is that it’s intermittent. A terminal that reads fine on a dry Tuesday morning fails on a foggy Friday night because the moisture changes the resistance at the connection.
Here’s the inspection:
- Pass: Terminal screws are clean, copper strands are bright, no white or green residue anywhere on the block or board.
- Watch: Dull or dark screws but no visible corrosion product. Clean and re-torque within 60 days.
- Fail: White or green residue on any terminal, or copper strands that are black or brittle where they enter the screw clamp. The corroded section must be cut back to clean copper and re-terminated, and the conduit seal must be replaced.
If you look at the bottom of the operator housing and see a rust ring or water staining, the conduit seal has failed. That’s the rubber or foam gasket where the flexible conduit enters the operator. Once that seal goes, every fog cycle pushes damp air into the enclosure. Replacing a conduit seal is a five-minute job with a $4 part. Replacing a control board corroded by three years of marine-layer moisture is a $300 to $600 job, not including the service call.
For any Huntington Beach gate within a half mile of the surf, we recommend checking terminal block condition every six months. Inland, once a year is usually enough. Write down what you see. A terminal that goes from “dull” to “green” between two checks tells you the housing gasket is failing, even if the motor still runs fine.
Photo-Eye Alignment and the 1/8-Inch Standard
The photo-eye is the infrared beam across the gate opening that tells the operator to stop and reverse if something crosses the path. It’s a safety device, and in California it’s required on any automated gate that opens into or out of a pedestrian-accessible area, with details covered in our guide to Gate Repair Permits, Codes & Inspections in CA: What You Need to Know. When the beam is misaligned, the gate refuses to close, or it reverses mid-cycle, or it won’t respond at all. The most common cause in Huntington Beach is not a failed photo-eye. It’s a shifted post.
Wooden fence posts swell and shrink with the coastal humidity cycle. A post that moves even 1/4 inch can throw the beam off enough that the receiver misses the signal. The alignment standard we use is simple: the beam must be aligned within 1/8 inch of dead center on the receiver lens, measured by the indicator light on the receiver unit.
Here’s the homeowner-verified check, no tools required:
- Close the gate. Look at the receiver photo-eye (the one without the wire going to the controller, usually). Find the indicator LED.
- Note the color. On most residential operators, a solid green or red light means aligned and receiving. A blinking light or no light means no beam.
- If the light is off, gently wipe both lenses with a dry cloth. Coastal grime builds a film that scatters the beam.
- If the light is still off, look down the beam line from the receiver to the transmitter. You’re checking whether the two units point directly at each other.
- Sight from directly behind the receiver. If the transmitter lens appears to be more than its own width off-center, the alignment is out of spec.
If the beam is out of alignment by more than 1/8 inch at the lens face, the system will be intermittent. It may work at 3 p.m. and fail at 7 p.m., because the gate leaf shifts with temperature and changes the angle of the beam path. A homeowner can often nudge a photo-eye bracket back into alignment by hand if the screws are not stripped. But if the post itself has moved, tightening the bracket only lasts until the next weather cycle. That’s a technician repair, and it’s listed in the next section.
Brands like Ghost Controls and BFT use slightly different LED patterns for their photo-eye diagnostics, but the 1/8-inch alignment principle holds across all of them. If the receiver can’t see the transmitter at dead center, the safety circuit won’t close. That’s the system working as designed, not a defect.
How to Log Findings Across Visits So Patterns Appear
The difference between a homeowner who spends $200 on maintenance and one who spends $2,000 on a replacement is rarely knowledge. It’s memory. A gate that sags 1/8 inch this year and 1/4 inch next year is sending a signal. But if you never wrote down the first reading, you can’t see the trend. You just notice the gate is binding one morning and assume it happened suddenly. It didn’t.
Here’s a logging method that takes five minutes per quarter and produces the exact same record we leave on every our Gate Repair services visit, adapted for a homeowner’s use:
- Create a simple note file or notebook page titled “Gate Log” with the date and a weather note. “March 15, overcast, marine layer until 10 a.m.” matters more than you’d think.
- Record the sag measurement from the section above, in inches. “Leaf drop at latch post: 3/16 inch.” Not “looks okay.” A number.
- Record the amp reading if you have one, or write “amp check recommended” and note whether the motor sounds different than last check. “Motor hum louder at startup than November.”
- Record the terminal block condition in one of three words: clean, dull, or corroded. Dull is an early warning. Corroded is a repair item.
- Record the photo-eye status in two words: aligned or blinking. Note which photo-eye if there are two pairs.
- Photograph the operator housing, the hinges, and any measurement you take. Three photos take 30 seconds. Six months later, a photo of “dull” terminals tells you more than your memory will.
This is not busywork. This is the documentation habit that prevents repeat service calls, and you can find more guides & resources on our blog. When a technician has your log with actual measurements, they can see whether the sag is accelerating, whether the terminal corrosion appeared before or after the last rain, and whether the amp draw has been trending upward for two checks. A homeowner in Huntington Beach who hands us a gate log gets a faster diagnosis and a more accurate written price than one who says “it started making a noise a few months ago.”
We’ve been doing this commercially since 2014, when Adrian Vance started documenting access-control sites with photos and written readings instead of memory. It applies just as cleanly to a residential driveway gate. The skill is not the measurement. The skill is the habit.
What a Homeowner Can Verify Without Tools vs. What Needs a Technician
Some of the items on this checklist are honest homeowner work. Some are not, and attempting the wrong one can turn a $90 service visit into a $400 repair or a hospital trip. Here’s the line.
Homeowner-verifiable without tools, safe and realistic:
- Sag measurement at the latch post with a tape measure.
- Hinge visual inspection for flaking, bubbling, or pin movement (by hand only, gate unpowered).
- Terminal block visual check inside the operator housing. Disconnect power at the breaker first if you’re opening a live enclosure.
- Photo-eye lens cleaning and alignment check using the indicator LED.
- Listening to the motor during a full open and close cycle: note any grinding, squealing, or a change in pitch from the last check.
- Testing the safety reverse: place a cardboard box in the gate path. The gate should stop and reverse before crushing the box.
Technician-only work, never homeowner:
- Any measurement with a multimeter on live terminals or motor leads. We use a contactless clamp meter. A homeowner without the right meter and insulated leads can arc a terminal or short the control board.
- Opening the gearbox or motor housing. The capacitor inside a gate operator stores a charge even after the breaker is off. A discharged capacitor can deliver a shock.
- Adjusting limit switches. This is the most common cause of a motor burning out. Set a limit switch wrong and the operator pushes against the mechanical stop every cycle until something fails.
- Spring or counterweight work on any gate. Gate springs hold stored energy. Releasing that energy incorrectly can break fingers or worse.
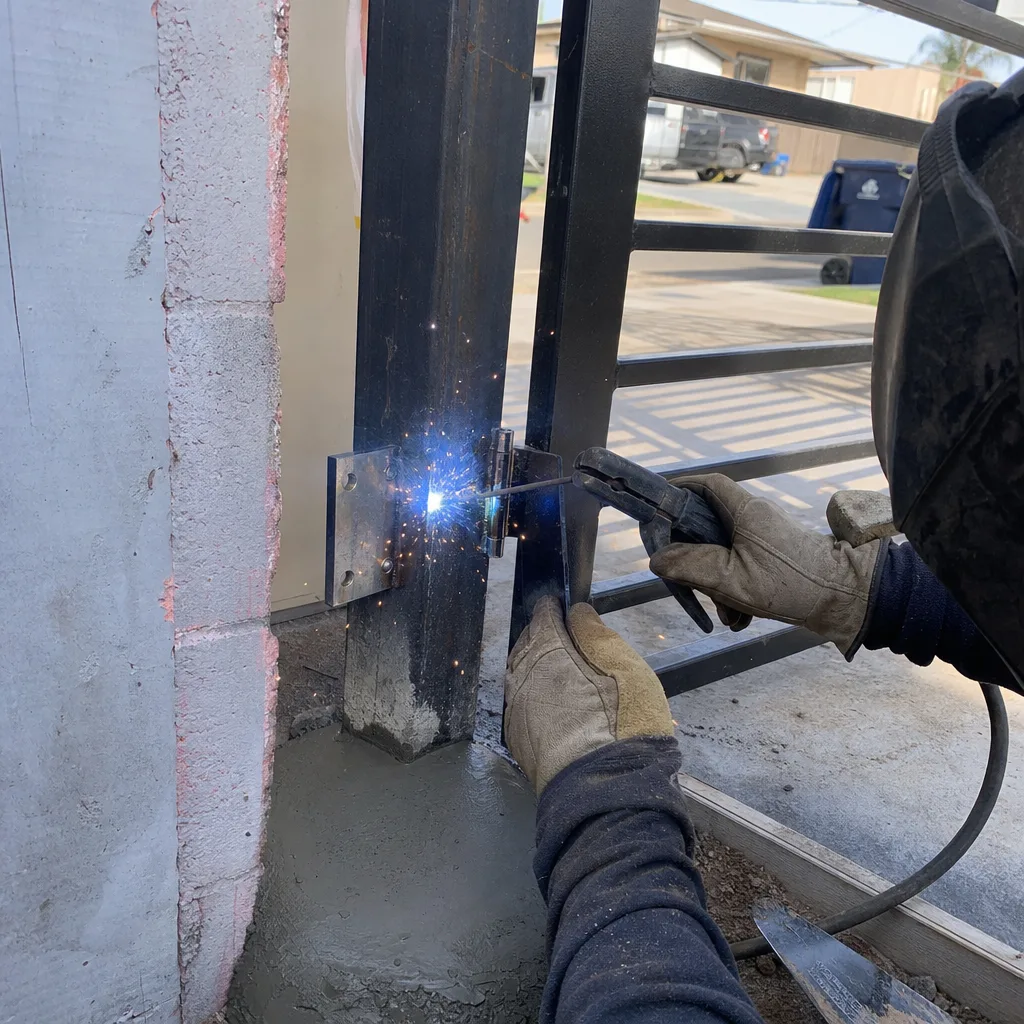
- Welding or hinge replacement on a sagging gate. The leaf needs to be supported and isolated before the hinge is cut loose. Most DIY hinge replacements we’ve seen end with a dropped leaf and a bent gate.
If you complete the homeowner checks and any reading exceeds the fail thresholds in this guide, that’s when you call. The written price we leave before any work starts means you’ll know the number before a wrench turns. If another company has already quoted you, bring the paperwork. We review other estimates at no cost as a second opinion.
Common Mistakes to Avoid
- Greasing a failing hinge instead of measuring it. Grease does not restore lost metal. If the hinge wall is flaking, lubricating it only masks the symptom for a few weeks while the motor continues to work against the sag.
- Using WD-40 on hinge pins. It’s a water displacer, not a load-bearing lubricant. On a 400-pound gate leaf, WD-40 gets squeezed out of the pin bore within days. Use marine-grade lithium grease.
- Ignoring a blinking photo-eye because the gate still closes. A photo-eye that intermittently loses beam is a safety device failing. It’s also a minor fix now and a bigger one later if the failure is in the wiring, not the alignment.
- Assuming terminal corrosion is “just cosmetic.” White powder on a terminal screw is electrolysis actively eating the copper. It does not stop on its own.
- Failing to log sag measurements. A gate that drops 1/8 inch per year will be out of spec in two years, but if you never measured the first reading, you won’t know it’s accelerating.
- Running the gate after a motor starts making a new noise. A new grinding or squealing sound is not a break-in behavior. It’s metal on metal. The longer it runs, the more parts wear, and the repair cost climbs with every cycle.
- Disconnecting safety devices to make the gate “work again.” In California, automatic gates in residential areas are subject to UL 325 safety standards. Bypassing a photo-eye or safety loop to force the gate closed is a liability you don’t want if a child or pet is injured.
When to Call a Professional
If your sag measurement exceeds 1/4 inch, your terminal block shows green or white corrosion, your photo-eye stays out of alignment after cleaning, or your motor sounds different than it did a month ago, call. Any one of those is a measurable sign that the system is failing, not a generic “maybe it’s time.” Vance Gate Repair Huntington Beach offers free estimates in Huntington Beach and the surrounding area. Call (657) 271-2877 and you’ll get a live person, a scheduled visit, and a written price before any work begins. If another company has already quoted you, bring the written estimate and we’ll review it at no charge.
Frequently Asked Questions
Check the hinges, photo-eyes, and terminal block every six months if you live within two miles of the ocean, and every twelve months if you’re further inland. The marine layer accelerates corrosion on metal components and electrical connections. A six-month check takes under an hour and costs nothing if you’re doing the homeowner-visible items yourself. Call (657) 271-2877 if you want a professional inspection with written documentation.
Most maintenance visits in Huntington Beach run between $95 and $250 depending on what needs adjustment or cleaning. The line-item cost changes if we find a corroded terminal block or a sagging hinge, but you’ll get the written price before any work starts. Free estimates are available by calling (657) 271-2877.
Yes for about half the items on this checklist: sag measurement, visual hinge inspection, terminal block visual check with the power off, photo-eye lens cleaning, and listening to the motor during a cycle. Do not attempt amp draw testing, limit switch adjustment, or spring work. Those need a technician with the right equipment and training.
Sagging means the hinge wall or hinge post has lost material or shifted, dropping the leaf from its original travel plane. Less than 1/8 inch is normal. Between 1/8 and 1/4 inch is developing wear to re-check on a shorter interval. More than 1/4 inch means the motor is working against the sag every cycle and hinge replacement is the likely repair. For a precise measurement and a written repair price, call (657) 271-2877.
Yes. The marine layer pushes damp, salt-laden air into the operator housing through failed conduit seals, and that air condenses on the terminal block and control board. The result is corrosion on electrical connections that mimics wiring failures. Six-month visual checks of the terminal block are the most effective prevention for Huntington Beach gates within two miles of the coast.
First, wipe the photo-eye lenses with a dry cloth and check that the receiver LED is solid, not blinking. Then check the terminal block for white or green corrosion. If both look clean, note the motor sound and call (657) 271-2877. Sudden failure to close is usually a photo-eye alignment or safety circuit issue, and a technician can identify it quickly with the documentation from your last check.
The Bottom Line
A maintenance checklist that doesn’t give you a pass/fail number is just a list of things to look at. The numbers in this guide – 1/4 inch of sag, 12 amps of draw, 1/8 inch of photo-eye alignment – are the difference between maintaining a gate and discovering a failure after it happens. Write down your measurements. Photograph what you see. If any reading crosses the fail threshold, call Vance Gate Repair Huntington Beach home base at (657) 271-2877. You’ll get a written price before any work starts, a documented record when we leave, and a 365-day promise that if the repair isn’t right, we make it right. For new gate work, see our Gate Installation in Huntington Beach page. And if your maintenance log shows a system beyond repair, the same honest documentation applies to every replacement we quote.
Written by Adrian Vance, Owner at Vance Gate Repair Huntington Beach, serving Huntington Beach since 2014.